

Using my 3D printer and knowledge of control systems from university to produce a ball balancing robot for revision Purposes.


Project Contents
Click on an image to go to that chapter


* The Application Autodesk Fusion 360 (Personal) Was Used to create the shown CAD
Only A Crude Sketch

The purpose of this project was to be a practical way to implement and revise what I have learned this year about Control Systems, more specifically concerning PID.
The goal was to start from a very crude sketch of literally the first idea I had, of something that would push the boundaries of my skills in some form of PID based desk toy. And from the picture above a very crude sketch, it was.
In essence, my idea was some form os simple ball balancing system, but with a twist. In this case, the twist being some form of dual PID system where the main system for balancing the ball will have a nested system containing a similar motor controller system as the PID Stepper Servo project.
Initial Design Choices

The main principle, as described previously was to have one system which monitors the position of the ball, such as through distance, and another than manages the motor itself against disturbances such as changes of the gearbox's load from the object moved.
The object in question was chosen to be the promotional stress ball I received after completing my work experience at Leonardo. This was decided on the convenience of it being an appropriate size for the desk toy while also being light and soft for if it was to fall off.
In terms of sensing, a potentiometer a going to be used for the motor segment. Choosing a potentiometer was important as it was the sensing device I want to implement into the Pegasus 2 robot arm and I want to develop a system using one further rather than now changing to something different such as a Hall effect sensor or an encoder.
In regards to the ball itself, I had chosen an ultrasonic sensor. This was chosen as I didn't have a qIR sensor at hand and compared to the other optical-based sensors I have, this ultrasonic sensor seemed that it would be less prone to interference as being ultrasonic sound it shouldn't be affected by natural light from my window or though interference from the remote control, something that may be a common disturbance at my desk.
The downside to this is that many ultrasonic sensors not just have a maximum distance (in this case far greater than required by this use case) but also a minimum that can sometimes be as much as 4 cm before it can detect an object. Due to the scale of the system in question io knew the midpoint would be approximately 6cm and I could move the sensor back if required so I decided to test it before purchasing an alternative sensor.
I also wanted to use steering linkages from RC cars as I believed it to be a good option for the error detecting sensor for Pegasus 2, so having a similar yet different way to implement such component would pose as good research into there usage.
The Gearbox

In the design for the gearbox i aimed at producing a system where the motor connected to the input shaft would have its torque amplified by a factor of three to the output shaft.
In contrary to the experimental gearbox from the first gearbox project, the PID feedback potentiometer wouldhave a 1:1 relationship with he output shaft rather than the motor. Thos would;d mean there would be less of a physical sweep angle restriction by the potentiometer and ultimately it is the angle of the output shaft that is being measured, which in this use case i believed more important.
The gearing was achoved by having only two shafts each including a gear producing a 3:1 ratio. The shafts extended both ends of the gearbox from the base to the cover with a small clearance for lubricant and printing imporfectiuons. Th reason for the shafts ectednign both sides was to price a more rigid system which would not become loose if the sensor or motor was removed.
The 1:1 ratio between the output shaft and potentiomeer was achieved by having the sensor connect through e shaft directly by an opening at one end. This was believed to be more reliable and more concise than adding additional gearing and would also aid as additional alignmtn fore the gear and sensor.
Both gears also had protrusions that would pass the cover, this was to aid to extra support and alignment under high stress. As well as this, the input shaft was given a small arrow that would indicate its position foe easy alignment, gearbox building and mainatnace and egenral diagnostics by checking no teath have visually jumped overtime.
The base was also designed to be the walls of the gearbox, which proved to be more rigid than the lid in the previous gearbox project, and would allow for a simple but right cover plate to be screwd ontop. have ign the cover as just a thick plate with no direct requirements for general structerl rigidity allowed for greater access opening to be produced int eh cover for means of inspection nd lubreication.


The gearbox housing itself was easy to print and no additional supports were needed compared to when it was only a base in previous projects. The gears, however, they both required some additional support material of which in this case could not be avoided.


When producing the last gearbox I found that the different colour filaments needed slightly different settings in regards to temperature and rafts. For example, on the standard profile, I found that the red parts will not split from the rafts or support material and that the black filament seemed as the temperature was too high as it seemed to all be a melted lump around the sides.
After creating new custom profiles the new parts were produced with major improvements in quality, which can be seen by the vividity of the parts shown above.
The only issues that were found with the parts were the clearness of the indicator arrow on the inputs shaft, most likely due to it being too small to print accurately and some basic clearance issues that were cleaned up with needle files.

Once finished the gearbox was tested with the system of the previous gearbox and made a nice addition to that series. (The PID Gearbox series is still in progress hence why the story has not been released)
Printing The Body

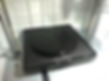
The base was really easy to print, here is a picture of to standing up after the support material was removed.
The base design was originally designed to be low profile with what I presumed the minimum width needed. This did work very well but later in the project, I found that the rigidity of the wires and their natural path would cause them to try to push the device over.

When printing the table, I designed it to be made through two halves, the first half where ts the actual platform the ball rolls inside and the bottom where it bolts to the sand and motor linkage. I chose to do this as it would result in less support material and faster printing, though it still took over 8 hours to print.

The gearbox seemed to add on with a quite snug fit and once the motor was added it seemed pretty stable. The top of the stand had to be filled down to all for better clearance with the table but apart from that, it was all coming together very fast.

The ultrasonic sensor was added to the table and initially tested with a simple distance reading sketch. As hoped the device didn't read the walls of the balance table and worked pretty accurately. The tight fit f the sensor also allowed for no glue to be needed but enough freedom to be able to make small adjustments to staring distance.
The gears were added with little to no issues and grease was added to reduce friction with any meeting surfaces. The indicator for the input shaft made timing the gears effortless.
The RC car steering linkage seemed about a perfect size already but slight adjustments were made. It proved very useful and conformed any queries I had of it ready for implementing into the error checking system of the Pegasus 2 rot arm.
A new base platform labelled with "PID Revision Project" was added for better stability and as a place to mount the stepper driver board. A small piece was added at the end of the table as an end stop for the ball.


Mechanically the system is now finished and sleeving was added to the cables for better protection and cable management.
Testing the system

The now completed system was now ready for programming and testing (More on that coming soon) and so far it both worlds and looks great!
Some improvements can be made in the turning as from he footage below, even tough it mostly works there is still a little overshoot and oscillations present in turns of adjusting the table. As well as this the potentiometer in the gearbox is slightly loose so a spacer is going to be made. Fixing the sensor will prevent it from occasionally moving slightly and overshooting when the device changes the direction too fast.
Project By Ryan Brown (CMOSS Founder)
February 4th 2021